Try this on your porch, patio or deck...you can always find free pallets on craigslist.
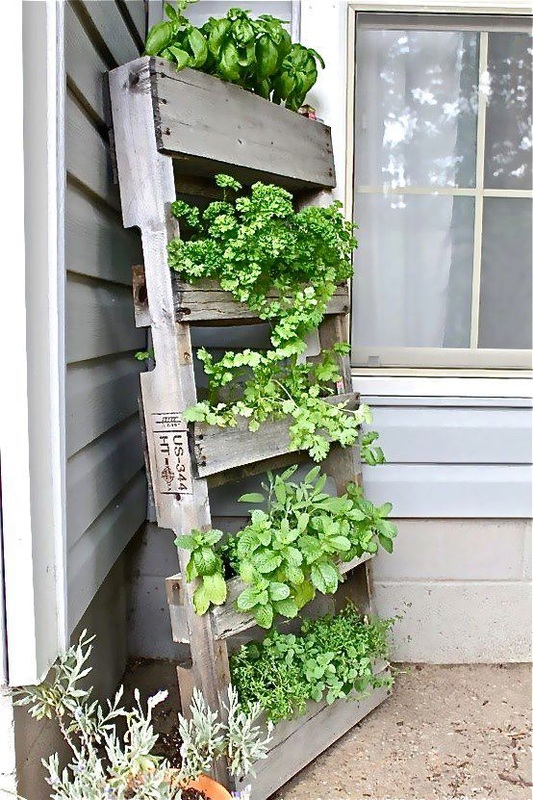
Try this on your porch, patio or deck...you can always find free pallets on craigslist.
0 Comments
It has now been seven days since my first celery post, and of the two, one has grown a lot. The other is growing as well, but slower. I still do not have them in any dirt, only sitting on a paper towel with a bit of water in the bottom. I am now thinking that it will grow and only produce seed, rather than a bunch like you would see at the store. But that is fine with me; I love to cook with the seed, and it will give me my own supply to plant. Below are some photos of the one that is really taking off.   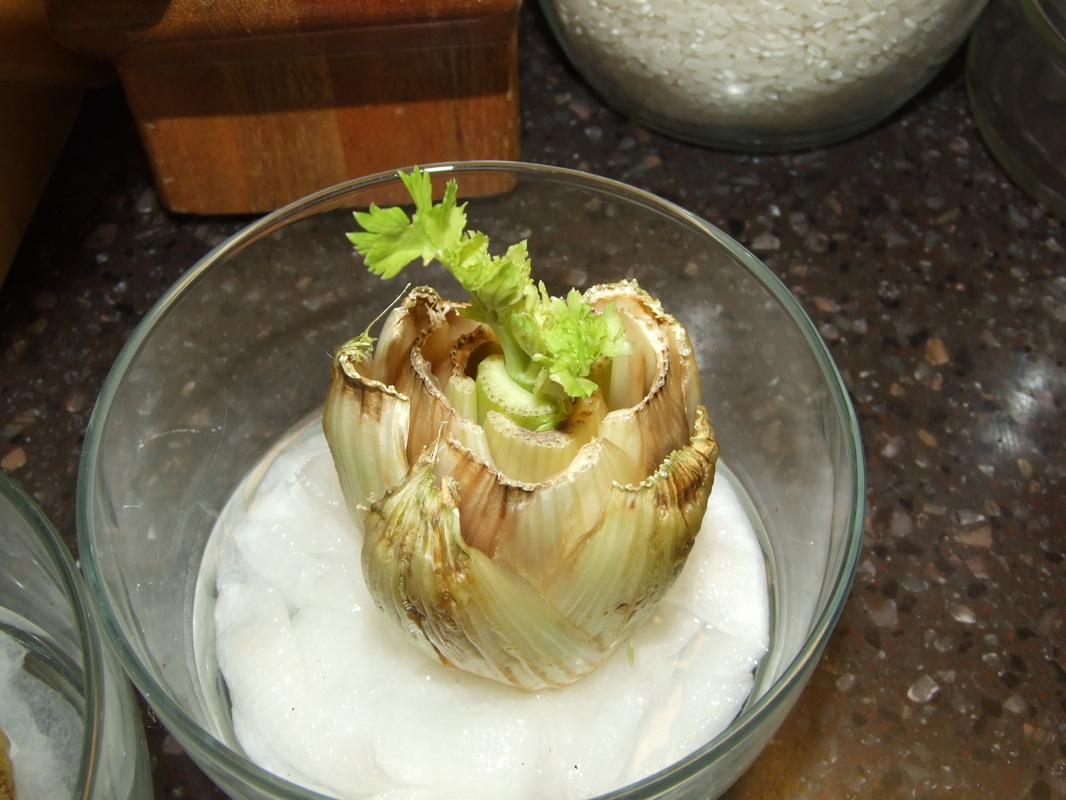 It was on the front page a couple of days ago, Organic Living Report is carrying my "Growing Celery from Scraps" story...
http://organiclivingreport.com/?s=celery Family Handyman magazine always has great ideas and is worth the price of a subscription. A dual rain barrel system for less than $100.00??!! And, you can add as many barrels to this sytem as you need. 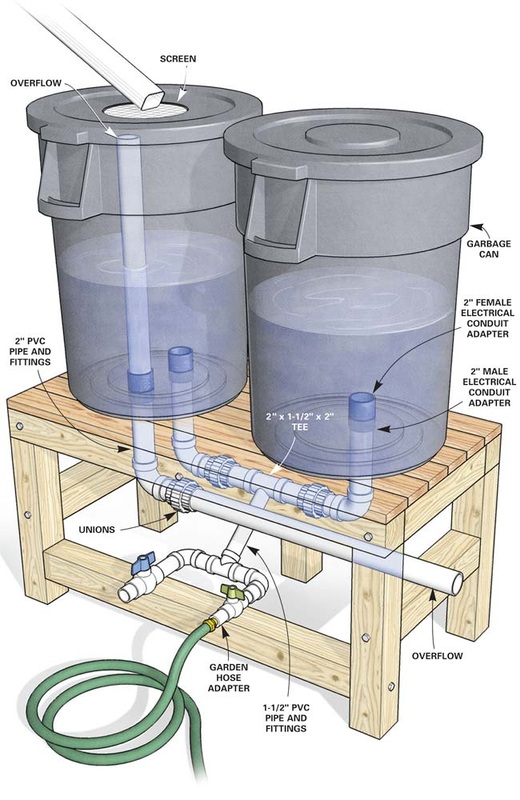
Most rain barrels that you buy are so expensive it's silly, and most DIY instructioins are for one barrel. Having two set up like this is great! From www.familyhandyman.com...
It's pretty easy to build your own rain barrels from plastic drums or trash cans. Search online for “bottles” or “containers” to find an “open head” plastic 55-gallon drum with a cover (about $60). Or find a used barrel by talking to car wash managers (they buy soap and wax by the barrel). If you can't find a container you like, buy a large, heavy-duty garbage can (about $35) at a home center. All the other plumbing parts will add up to about $40. Place the drum near a downspout, drill a hole in the side near the bottom and screw in a drain valve. That's an OK installation if you plan to run a soaker hose to your garden. But if you want to use a wand or a spray nozzle, you'll need to elevate the barrel on a stand for more water pressure. Water is heavy (55 gallons weighs 440 lbs.), so use 4x4 treated lumber for the legs and secure everything with construction screws or stainless steel lags. But don't place the stand on soft ground. You could kill somebody if the rig toppled over. If you have large gardens and want to store more water, double-size the stand and add a second barrel. Cut holes in the bottoms of the barrels with a 2-1/4-in. hole saw. Then screw in a 2-in. male threaded electrical (gray PVC) conduit adapter (electrical adapters aren't tapered like plumbing adapters, so you can tighten them down all the way). Squirt a thin bead of silicone caulk around the opening and screw on a threaded electrical PVC coupler to cinch the barrel between the two fittings (see Figure A). Next, glue together sections of 2-in. PVC pipe, unions (to make winter disassembly easier), reducers and valves. As long as you're at it, install an overflow pipe so you can direct the excess where you want it. Finally, cut a hole in one of the covers and mount a screen to filter out leaves and debris. Then just wait for the next big rain. For complete instructions and more photos, visit... http://www.familyhandyman.com/DIY-Projects/Green-Home/Saving-Water/how-to-build-a-rain-barrel The other day I posted about my experiment, Growing Celery From Scraps. This is update #1, photo from today. It's still growing! Will this actually work?? Stay tuned! 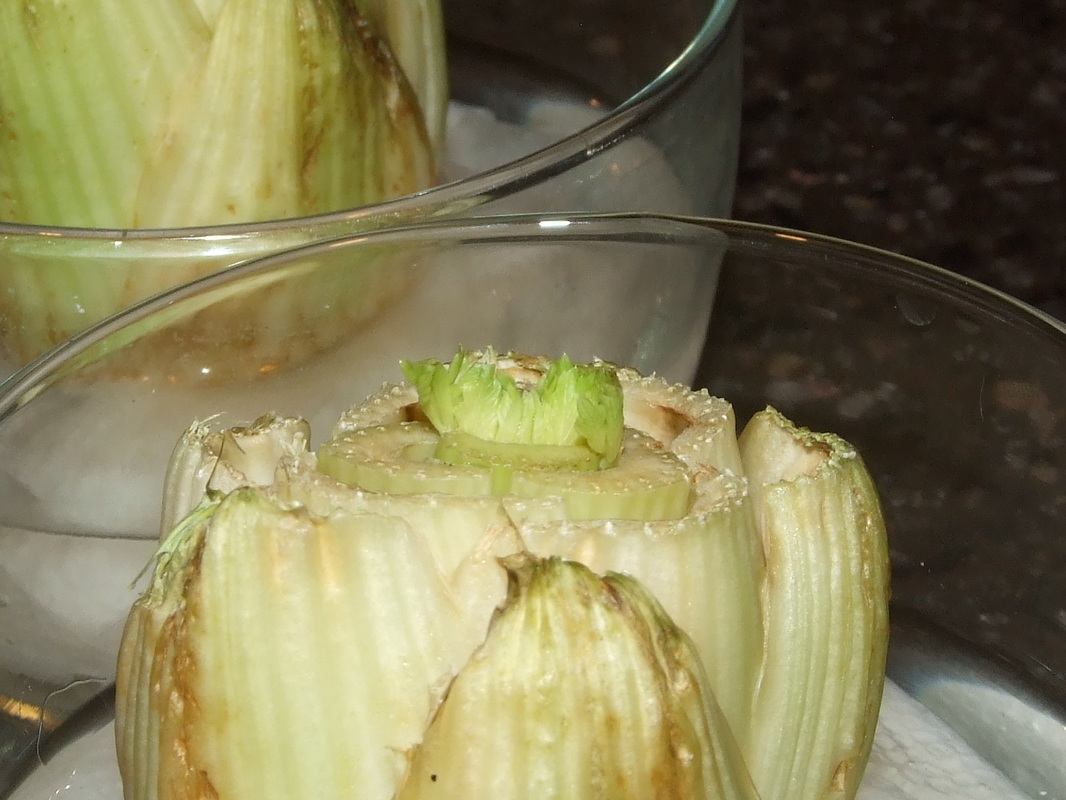 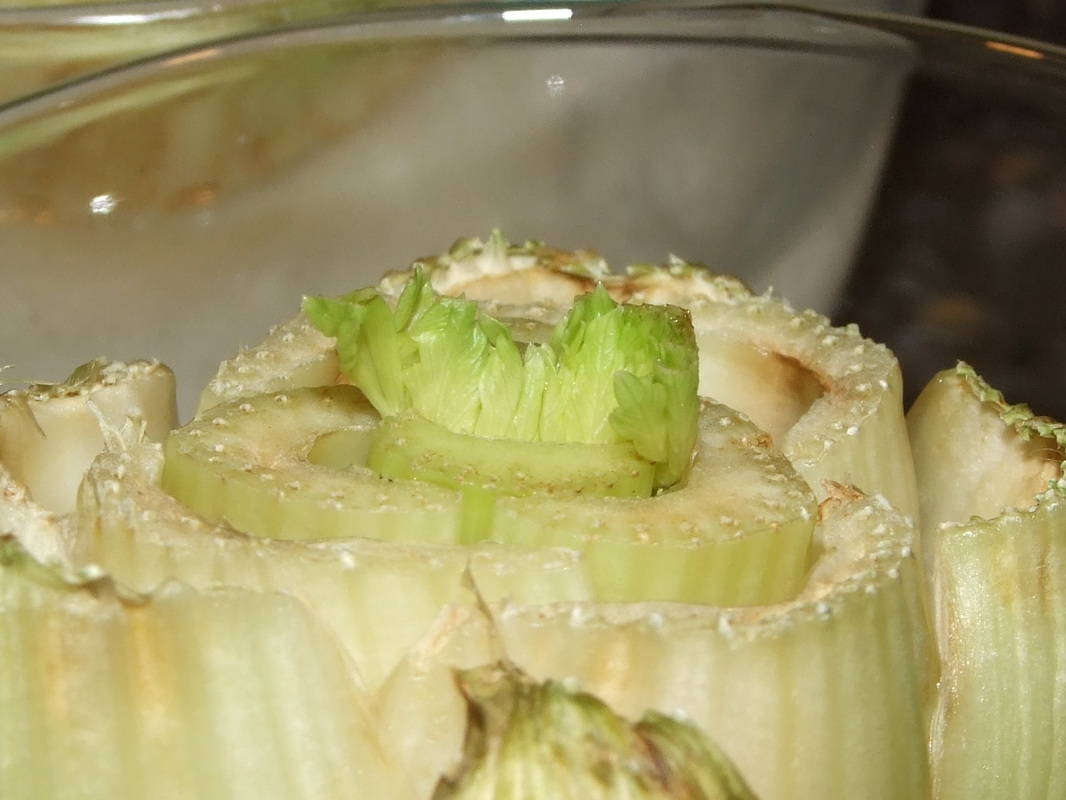  Try this tip to make your food stretch further...when I have left over mashed potatoes, I put them in a ziploc bag and store in the freezer. As I have other left over vegetables, green beans, corn, anything, I
add them to the same bag. After a week or two, I dump the contents into a big pot, add some water and chicken stock, and I have a really great vegetable soup, and it's already seasoned. I've seen this photo many times over the past couple of months, and people seem to really love the idea... 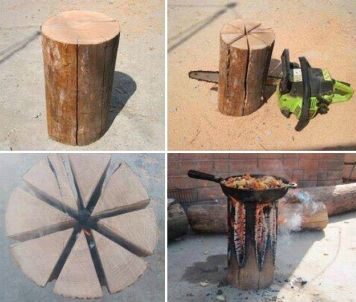
From survivaltek.com comes a different twist on the photo I've seen so often of cooking on top of a cross-cut log... A couple of weeks ago I was a vender at a local Faire. One of the benefits is that you get to meet interesting folks who share a wealth of wisdom from their experiences. One particular item was the Swedish Log Candle which was news to me. Of course, any topic with fire interests me because firecraft is my specialty. In this case, it’s not a fire making method, but more akin to a campfire method. It all begins with a seasoned log and a chainsaw. First, stand the log upright and begin to cut downward using 4 overlapping cuts in the same way that you would cut a pie, creating 8 equal triangles. Each cut can be made as low as 4 inches from the bottom. Some suggest that you can use the chainsaw blade tip to cut slightly lower at the junction of cuts, thus creating a shallow well at the bottom. Next, you need an accelerant such as kerosene, lamp oil, or lighter fluid to use as a fire starter or primer. Because I’ve already used my chainsaw, I also have the accompanying mixed gasoline, which works very nicely. Just pour the fluid down the middle of the cuts, wetting each wedge tip in the process, then let it soak for a minute or so. Be sure not to stand over the log when you light it, but stay off to the side, lighting it with an outstretched hand. After a slight “poof” of flame, the fire slowly begins to grow, starting slender then broadening outward. The edge of the wedge acts as kindling which sustains the process. As with all campfires, the quality and type of wood will determine the speed and brightness of the flame along with the duration of burn time. With appropriate cookware and suspension, this could be used for cooking, or with supervision and safe surroundings, it could be used decoratively at your next event. In any case, it’s a fun experience and well worth the time and effort to make.  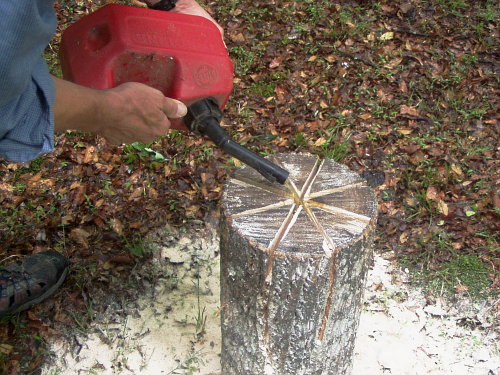 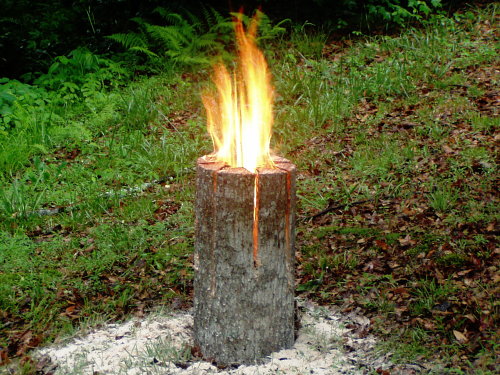 This beautiful structure was built for beans, but it could be used for any vining crop or perennial. We love anything that can be built using natural materials, especially when we can scout our own land for supplies. This bean house is in someone else's garden, but come spring it will be in mine, too. 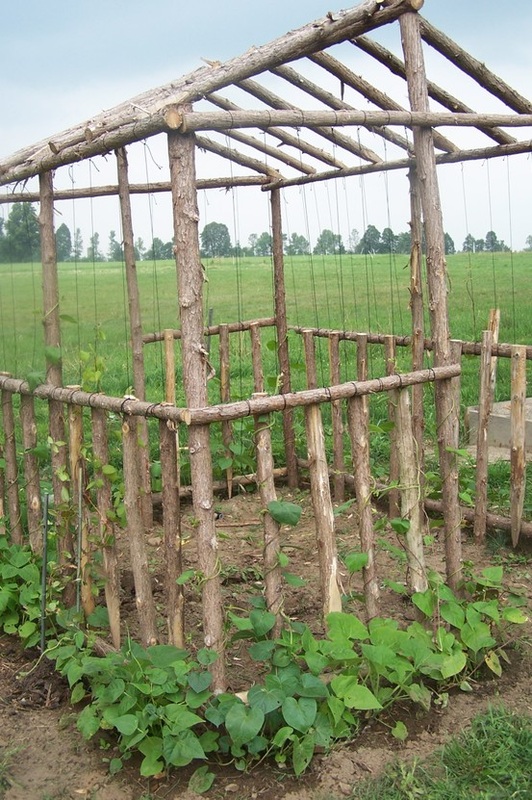
| If you like our blog and would like to help support what we do, please feel free to donate any amount to help keep us going! Our goal is to use this blog to help care for the animals. We will let you know how your donations are used. Thank you!
 The Enclyclopedia of Country Living is one of THE best homesteading books I have ever purchased, and I still refer to it often.
AuthorWe are city folk who decided to move our family to the country, to experience life the way it ought to be lived...OUTSIDE! CategoriesAll ArchivesFebruary 2014 
|

 RSS Feed